![มาเริ่มใช้ Git กัน [part 1]](https://tupleblog.github.io/images/post/usegit/blogcover.jpg)
สวัสดี วันนี้เราจะมาเขียนภาคต่อจากบล็อกก่อนของ @titipata ที่ได้มาแนะนำให้รู้จักกับ Git ไว้ บล็อกนี้ตั้งใจเขียนขึ้นเพื่อเป็นการนำทางเวอร์ชันภาษาไทยแก่ผู้เริ่มต้นที่อยากเริ่มใช้งาน git ผ่าน CLI (Command Line Interface) และจะค่อยๆ เพิ่มคำสั่งหรือทริคต่างๆ ไปเรื่อยๆ สำหรับคนที่ใช้เวอร์ชัน GUI (Graphical User Interface) อยู่แล้วถ้าได้ลองใช้ผ่าน CLI ดูสักครั้งอาจจะชอบก็เป็นได้
เกริ่นนำ
เนื่องจากเราอยากเขียนสำหรับผู้ที่เริ่มต้นจริงๆ ถึงแม้จะเพิ่งรู้จัก CLI ใหม่ๆ ก็น่าจะทำตามได้ ดังนั้นสิ่งที่จะทำในบล็อกนี้ก็จะค่อยๆ ไปเป็นขั้นเป็นตอนประมาณนี้
- ติดตั้ง git ทั้งบน Windows, Mac และ Linux
- ตั้งค่า git เพื่อใช้งานครั้งแรก
- สร้าง local git repository (repo)
- สร้างความเปลี่ยนแปลงบน repo
- สร้าง remote repo บน GitHub
- push ความเปลี่ยนแปลงไปยัง remote repo
- clone remote repo แล้วทำการแก้ไข
- pull ความเปลี่ยนแปลงจาก remote repo
หลักๆ สำหรับบล็อกนี้ก็น่าจะประมาณนี้ ไปเริ่มกันเลยดีกว่า
เตรียมความพร้อม
สิ่งแรกสุดที่เราต้องมีคือ git นั่นเอง บล็อกของ @titipata ก็กล่าวไว้บ้างแล้ว แต่ถ้ายังไม่ได้ติดตั้งก็ลงมือได้
- Windows ไปดาวน์โหลดตัวติดตั้งได้จากหน้าเว็บของ Git เลย - https://git-scm.com/downloads แล้วก็ next ยาวๆ จนเสร็จ
- Mac ก็ไปดาวน์โหลดที่หน้าเว็บได้เช่นกัน หรือถ้าใครมี Homebrew หรือ MacPorts ก็ลงผ่าน terminal ได้เลย
brew install gitหรือport install gitก็ว่ากันไป - Linux ตามแต่ distro ของท่านเลย - https://git-scm.com/download/linux
การใช้งานบน Windows ให้เปิดโปรแกรม Git Bash ขึ้นมา ส่วนบน Mac และ Linux ก็เปิด terminal ขึ้นมา เท่านี้ก็พร้อมลุยกันแล้ว
สิ่งที่ต้องทำต่อมาคือการระบุตัวตนโดยเราจะต้องใส่ชื่อกับอีเมล์ของเราให้ git จำไว้ เพื่อเวลาที่มีการแก้ไขจะได้รู้ว่าใครเป็นคนแก้ไข โดยอีเมล์แนะนำให้ใช้อันเดียวกับที่สมัคร GitHub ส่วนชื่อก็อะไรก็ได้ เหมือน username บน GitHub ก็ดี
$ git config --global user.name "Your Name"
$ git config --global user.email yourEmail@example.com
พูดถึง GitHub ถ้ายังไม่มีแอคเคาท์ก็ไปสมัครไว้ก่อนเลยนะ ที่นี่เลย https://github.com/join
คำสั่งพื้นฐาน
คำสั่ง CLI
ก่อนจะไปใช้คำสั่ง git คำสั่ง CLI ก็เป็นสิ่งที่ต้องรู้ด้วย ไม่งั้นเราจะไปต่อกันไม่ได้ ถ้าใครรู้แล้วก็ข้ามไปคำสั่ง git ได้เลย คำสั่งที่ต้องรู้คือ
pwd(print working directory (dir)) ใช้เมื่ออยากรู้ว่าตอนนี้เราอยู่ที่ dir ไหนcd(change dir) เพื่อเปลี่ยนไปยัง dir อื่นls(list) ดูว่าใน dir ที่เราอยู่มีไฟล์หรือโฟลเดอร์อะไรบ้างmkdir(make dir) สร้างโฟลเดอร์ใหม่ขึ้นมาtouchสร้างไฟล์ใหม่
เอ้า ตัวอย่างมา.. (อ้อ บรรทัดที่มี $ นำหน้า คือ input ที่เราพิมพ์ลงไป ส่วนที่ไม่มีก็คือ output นะ)
$ pwd
/Users/username
$ ls
Desktop    Documents    Downloads
$ cd Desktop
$ pwd
/Users/username/Desktop
$ cd .. && pwd
/Users/username
$ mkdir gitrepo
$ ls
Desktop    Documents    Downloads    gitrepo
$ cd gitrepo
$ touch readme.md
$ ls
readme.md
ก็ประมาณนี้ ตอนนี้เราก็ได้สร้างไฟล์ readme.md ไว้ในโฟลเดอร์ชื่อ gitrepo แล้ว อันนี้จำไว้ด้วยนะว่าอยู่ไหน ถ้ารู้สึกว่ายังไม่คุ้นเคยที่จะทำทุกอย่างผ่าน CLI ก็เปิดโฟลเดอร์ gitrepo ที่ได้สร้างไว้ขึ้นมาเลย
คำส่ัง git
โดยพื้นฐานแล้ว git มีคำสั่งที่หลากหลายมากมายมหาศาลมาก แต่เราจะเริ่มกันด้วยคำสั่งเบื้องต้นที่ทำให้เราสามารถใช้งานได้ก่อนอันได้แก่
git initใช้สร้าง local repo ขึ้นมาgit addใช้ stage เพื่อติดตามตามความเปลี่ยนแปลงของไฟล์git commitใช้เพื่อบันทึกความเปลี่ยนแปลงที่เกิดขึ้นสู่ local repogit pushใช้เพื่อส่ง commit ไปยัง remote repogit cloneใช้เพื่อคัดลอก repo จาก remote มายัง localgit fetchใช้ดึงความเปลี่ยนแปลงจาก remote มายัง local แต่ยังไม่รวมเข้าด้วยกันgit mergeใช้รวมความเปลี่ยนแปลงที่ได้มาจากfetchเข้ากับ localgit pullใช้ดึงความเปลี่ยนแปลงจาก remote มายัง local และรวมเข้าด้วยกัน (มีค่าเท่ากับfetch+merge)git logใช้เพื่อดูว่า git repo มี commit อะไรแล้วบ้าง
ทดลองกับของจริง
อะ รู้จักแล้วก็ไปกันต่อเลย ต่อไปเราจะสร้าง GitHub repo กัน ไปที่เว็บ http://github.com พอล็อกอินเรียบร้อยเราก็จะอยู่ที่หน้าหลัก ดูข้างบนด้านขวากด + เลือก create new repository แล้วก็ตั้งชื่ออะไรก็ได้ แต่จะให้เหมือนกันเป๊ะก็ใช้ชื่อ gitrepo ละกัน
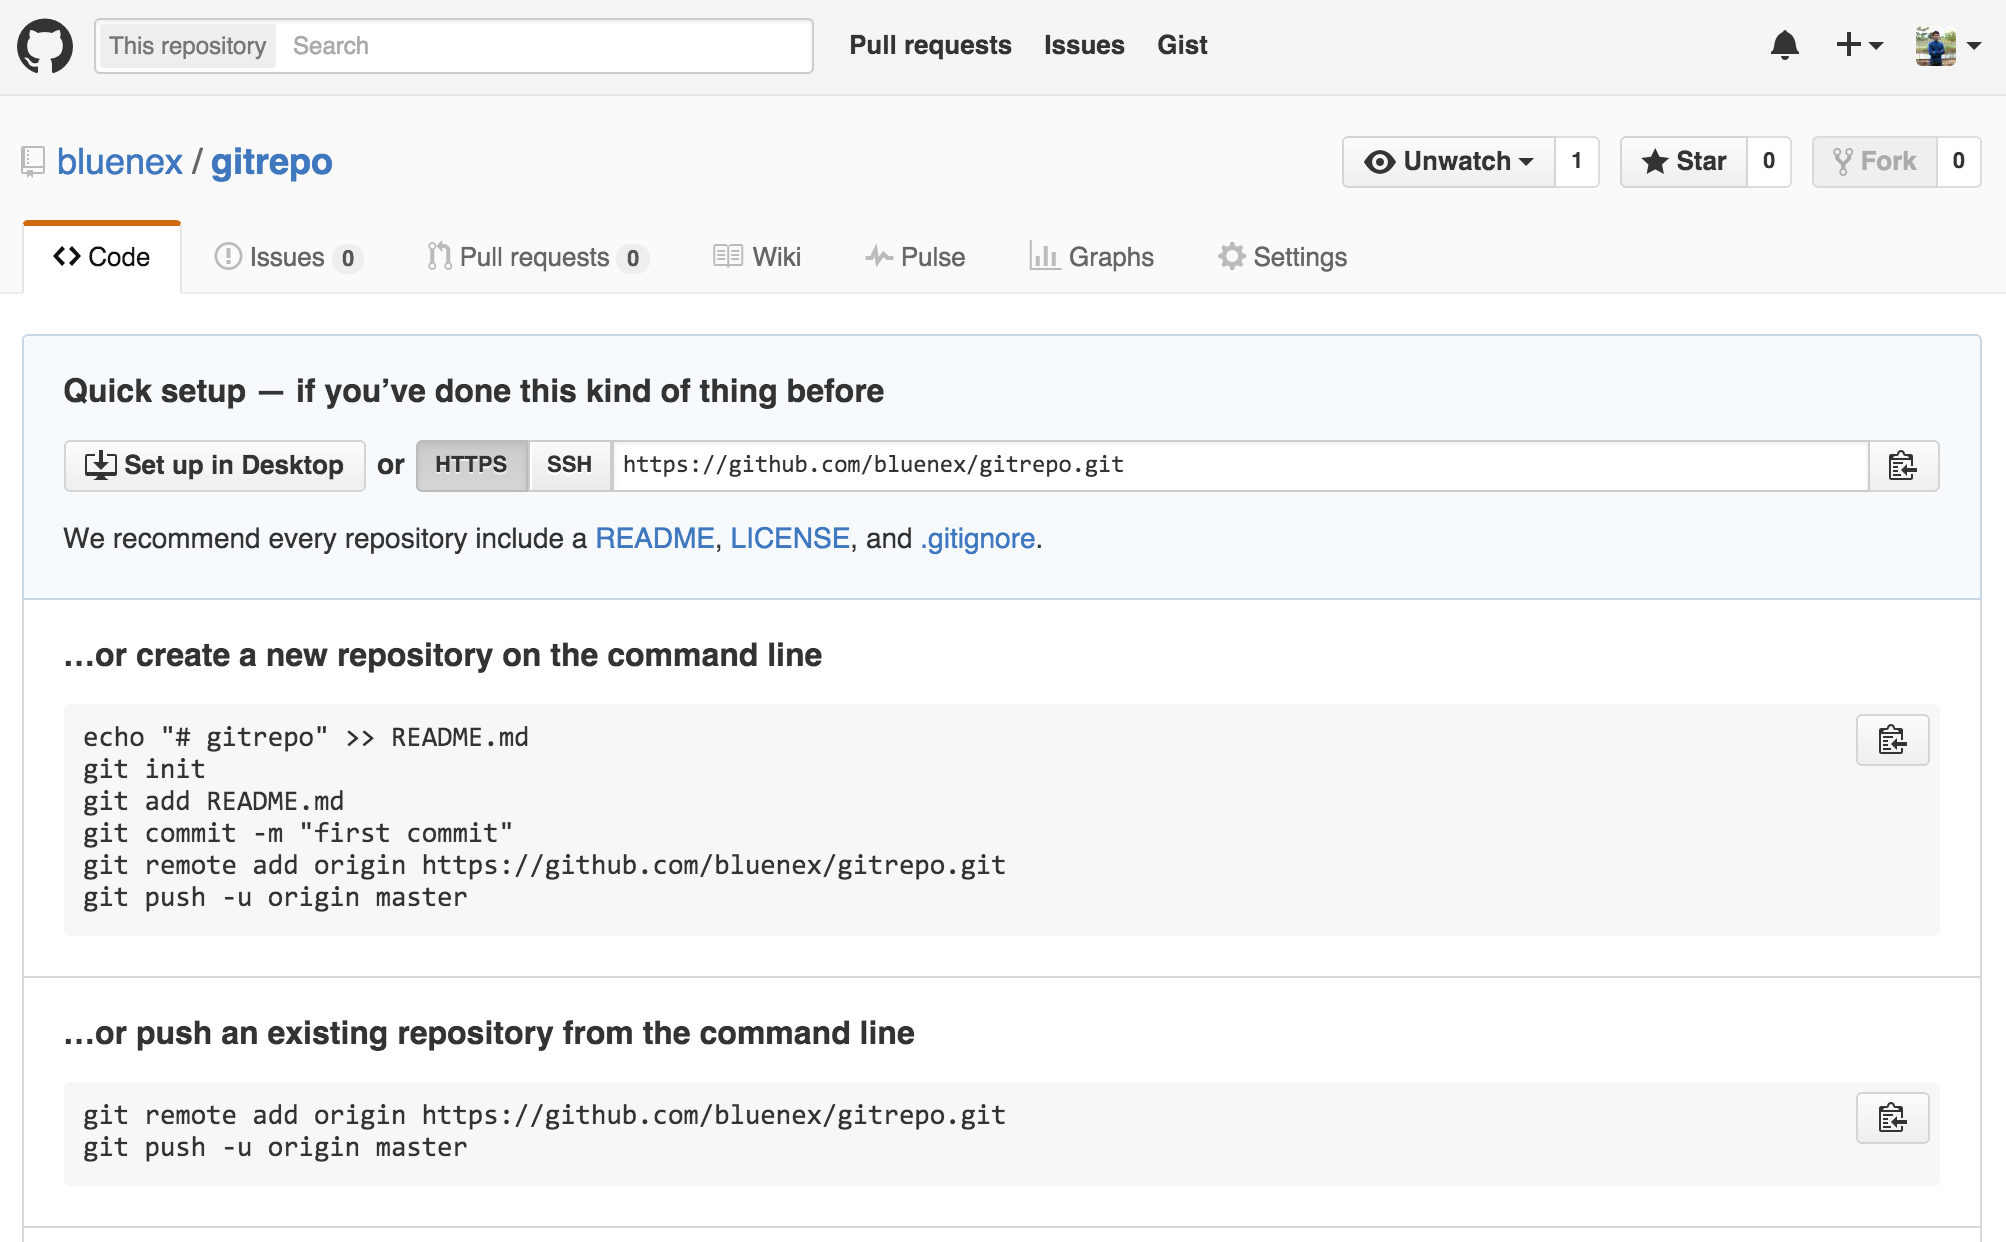
เสร็จแล้วเราก็จะมาอยู่ในหน้า repo ที่พึ่งสร้างเมื่อกี้ ก็ให้ก็อปปี้ repo url ไว้ โดยเลือกเป็นแบบ HTTPS ก่อน จากนั้น
ก็เปิด terminal ขึ้นมา แล้วเริ่มตามนี้เลย
init local repo & add remote repo
# เข้าไปในโฟลเดอร์ gitrepo
$ cd gitrepo

# สร้าง local repo ในโฟลเดอร์ gitrepo
$ git init
Initialized empty Git repository in /Users/username/gitrepo/.git/

# ลิสต์ไฟล์ที่อยู่ในโฟลเดอร์นี้
$ ls
readme.md

# คราวนี้ลิสต์ไฟล์ทั้งหมด ซึ่งเราจะเห็นโฟลเดอร์ .git ด้วย โฟลเดอร์ .git
# นี่แหละที่ทำหน้าที่เก็บความเปลี่ยนแปลงทั้งหมด
$ ls -a
.         ..        .git      readme.md

# ต่อมาเราจะมาเช็คว่า local repo นี้มี remote repo รึยัง
$ git remote -v

# เมื่อยังไม่มี remote repo เราก็จะเพิ่มมันเข้าไป โดยใช้ url ที่ก็อปปี้ไว้เมื่อกี้
$ git remote add origin https://github.com/bluenex/gitrepo.git
$ git remote -v
origin  https://github.com/bluenex/gitrepo.git (fetch)
origin  https://github.com/bluenex/gitrepo.git (push)
check status
# คำสั่งตรวจสอบ status ของ repo เราจะใช้เพื่อตรวจสอบว่ามีอะไรเปลี่ยนแปลง
# บ้างมั้ยใน repo ของเรา ถ้ามีเกิดความเปลี่ยนแปลงอะไรขึ้นบ้าง กับไฟล์ไหนบ้างเป็นต้น
$ git status
On branch master

Initial commit

# เราจะพบว่ามีไฟล์ใน working dir ที่ยังไม่ได้ stage หรือถูกติดตามความ
# เปลี่ยนแปลงอยู่ ซึ่งก็คือ readme.md นั่นเอง
Untracked files:
  (use "git add <file>..." to include in what will be committed)

        readme.md

nothing added to commit but untracked files present (use "git add" to track)
stage files & check status
# ดังนั้นเราจะมาติดตามมันด้วยคำสั่ง add โดยในที่นี้เราใช้ . แทนชื่อไฟล์ โดย .
# หมายถึงทุกไฟล์ในโฟลเดอร์ gitrepo นั่นเอง
$ git add .
$ git status
On branch master

Initial commit

# ตรงนี้บอกเราว่ามีไฟล์ที่เปลี่ยนแปลงและรอการ commit อยู่นะ
Changes to be committed:
  (use "git rm --cached <file>..." to unstage)

# โดยการเปลี่ยนแปลงนี้คือการสร้างไฟล์ใหม่ขึ้นมา ชื่อ readme.md
        new file:   readme.md
commit staged files
# การ commit คือการบันทึกความเปลี่ยนแปลงเข้าสู่ repo ของเรา เป็นการย้าย
# จาก staging state ไปยัง repository state นั่นเอง
$ git commit -m "initial commit"
[master (root-commit) 8eec696] initial commit
1 file changed, 0 insertions(+), 0 deletions(-)
 create mode 100644 readme.md
check commits log
# เราสามารถตรวจสอบ commit ที่เกิดขึ้นใน repo ได้ด้วยคำสั่ง log
$ git log

# ซึ่งตรงนี้จะเข้าหน้าใหม่ ใช้ลูกศรเพื่อนำทาง หรือกด q เพื่อออก
commit 8eec6969f1e74ac2cef7411848def896a8c97582
Author: Bluenex <tulakan-@hotmail.com>
Date:   Wed Dec 16 11:38:54 2015 +0900

    initial commit
(END)
เอาล่ะ มาถึงตรงนี้เราก็ได้มา commit นึงแล้ว จากนี้เราจะทำการ push จาก local ขึ้นไปยัง remote repo โดยการ push เบื้องต้นเราต้องกำหนดว่าเราจะ push ไปที่ไหน (ในที่นี้คือ origin ให้คิดว่าเรากำหนดให้ remote repo คือ original copy และในเครื่องของเราก็มี local copy อยู่ด้วย) และ push ไป branch อะไร (ในที่นี้คือ master)
$ git push origin master
# กรอก username กับ password
Username for 'https://github.com':
Password for 'https://bluenex@github.com':
Counting objects: 3, done.
Writing objects: 100% (3/3), 212 bytes | 0 bytes/s, done.
Total 3 (delta 0), reused 0 (delta 0)
To https://github.com/bluenex/gitrepo.git
 * [new branch]      master -> master
เราจะเห็นได้ว่าการ push ทุกครั้งนั้นเราจะต้องกรอก username และ password ซึ่งก็เป็นรูปแบบการรักษาความปลอดภัยผ่านโปรโตคอล HTTPS ถ้าเริ่มเบื่อที่จะกรอกแล้วก็แนะนำให้ไปทำความรู้จักกับ SSH หรือ Secure Shell สำหรับ GitHub ซึ่งจะใช้รูปแบบอื่นในการรักษาความปลอดภัย
เมื่อทำการ push เสร็จเรียบร้อยไม่มี error ใดๆ ก็ลองกลับไปเช็คที่หน้าเว็บ GitHub อีกที ลองรีเฟรชหน้าเมื่อกี้ดูก็จะพบว่ามันเปลี่ยนไปแล้ว
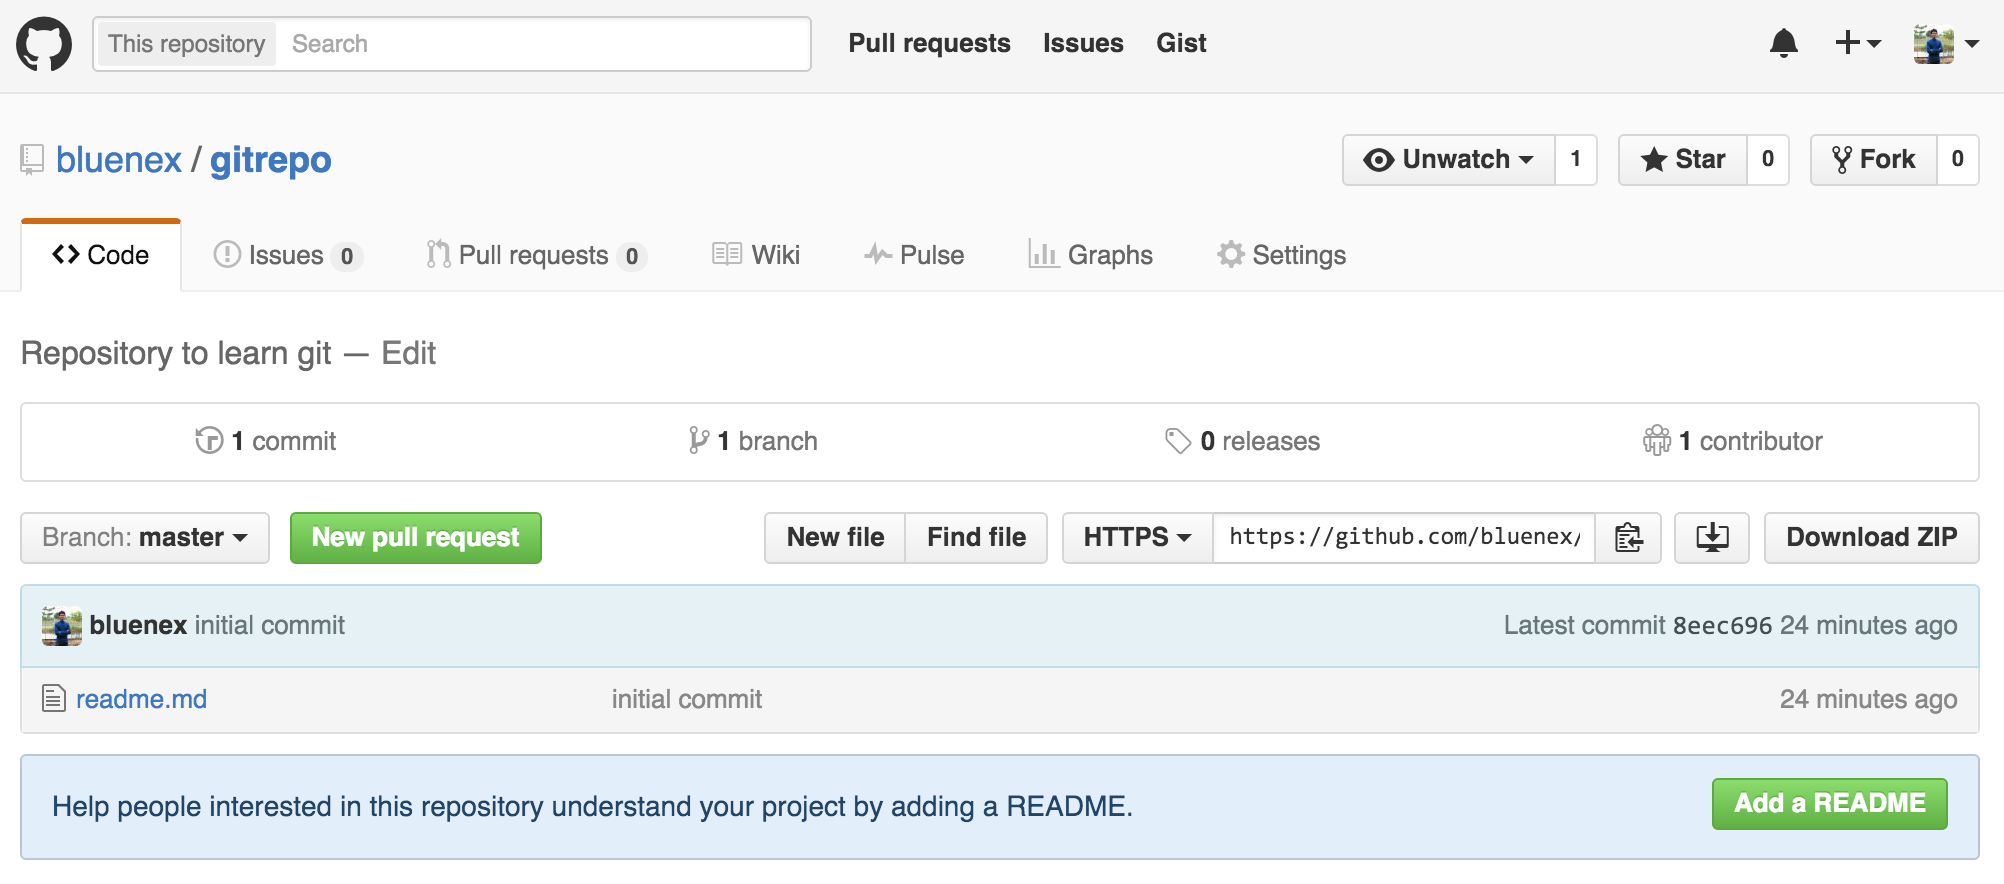
หน้านี้ถ้าเรากดตรง 1 commit เราก็จะสามารถเข้าไปดูได้ว่า repo นี้มี commit อะไรบ้างแล้ว และยังสามารถกดเข้าไปดูรายละเอียดแต่ละ commit ได้ด้วยว่าแต่ละ commit เกิดความเปลี่ยนแปลงอะไรขึ้นกับไฟล์บ้าง
เอาล่ะคราวนี้เราจะ clone repo นี้มาไว้ที่เครื่องเรา แต่ไม่ใช่ที่เดิม เป็นเหมือนการจำลองว่าเรา clone ไปในอีกเครื่องนึงนะ โดยเราจะ clone ไปไว้ใน dir เดียวกับที่โฟลเดอร์ gitrepo ของเราอยู่นั่นแหละ แต่ใช้ชื่อว่า another_pc_gitrepo ไปที่ terminal เลย
# ก่อนอื่นก็เช็คก่อนว่าเราอยู่ที่ dir ไหน
$ pwd
/Users/username/gitrepo
# แล้วก็ย้อนกลับขึ้นไปที่ /Users/username
$ cd ..

# จากนั้นก็ clone remote repo มาใส่โฟลเดอร์ชื่อ another_pc_gitrepo
$ git clone https://github.com/bluenex/gitrepo.git another_pc_gitrepo
gitrepo.git another_pc_gitrepo
Cloning into 'another_pc_gitrepo'...
remote: Counting objects: 3, done.
remote: Total 3 (delta 0), reused 3 (delta 0), pack-reused 0
Unpacking objects: 100% (3/3), done.
Checking connectivity... done.

# ลิสต์โฟลเดอร์ทั้งหมดอีกครั้ง จะพบว่าเรามีโฟลเดอร์ชื่อ another_pc_gitrepo ด้วย
$ ls
Desktop    Documents    Downloads    gitrepo    another_pc_gitrepo
$ cd another_pc_gitrepo
โอเค ตอนนี้เราย้ายมาอยู่ใน another_pc_gitrepo กันแล้ว เราจะมาลองแก้ไฟล์กัน เปิดไฟล์ readme.md ที่อยู่ในโฟลเดอร์ another_pc_gitrepo ขึ้นมา ใช้โปรแกรมอะไรก็ได้เช่น Notepad, TextEdit หรือจะ Gedit ก็ได้หมด เราจะลองสร้างความเปลี่ยนแปลงให้มันกัน
<!-- in readme.md file -->
# Hello
Hello, it's me, I was wondering...

สวัสดี นี่คือไฟล์ `readme.md` ที่ได้ถูกแก้ไขจากโฟลเดอร์ `another_pc_gitrepo`
เสร็จแล้วก็เซฟแล้วกลับไปที่ terminal คราวนี้เราจะติดตาม, บันทึกความเปลี่ยนแปลงแล้วก็ push มันกลับไปที่ repo อีกครั้ง
# ตรวจสอบ status ก่อน
$ git status
On branch master
Your branch is up-to-date with 'origin/master'.
# มีความเปลี่ยนแปลงที่ยังไม่ได้ stage อยู่
Changes not staged for commit:
  (use "git add <file>..." to update what will be committed)
  (use "git checkout -- <file>..." to discard changes in working directory)

        modified:   readme.md

no changes added to commit (use "git add" and/or "git commit -a")

# ทำการ stage แล้วก็ commit ซะ
$ git add .
$ git commit -m "from another_pc_gitrepo"
[master fc8d069] from another_pc_gitrepo
 1 file changed, 4 insertions(+)

# จากนั้นเราก็จะมาเช็ค log กันแบบสั้นๆ
$ git log --oneline

fc8d069 from another_pc_gitrepo
8eec696 initial commit
(END)

# แล้วก็ push to origin (remote repo)
$ git push origin master
Username for 'https://github.com':
Password for 'https://bluenex@github.com':
Counting objects: 3, done.
Delta compression using up to 4 threads.
Compressing objects: 100% (2/2), done.
Writing objects: 100% (3/3), 412 bytes | 0 bytes/s, done.
Total 3 (delta 0), reused 0 (delta 0)
To https://github.com/bluenex/gitrepo.git
   8eec696..fc8d069  master -> master
ถึงตรงนี้เราก็กลับไปดูที่ GitHub อีกครั้ง กดรีเฟรชแล้วคุณก็จะพบกับ…
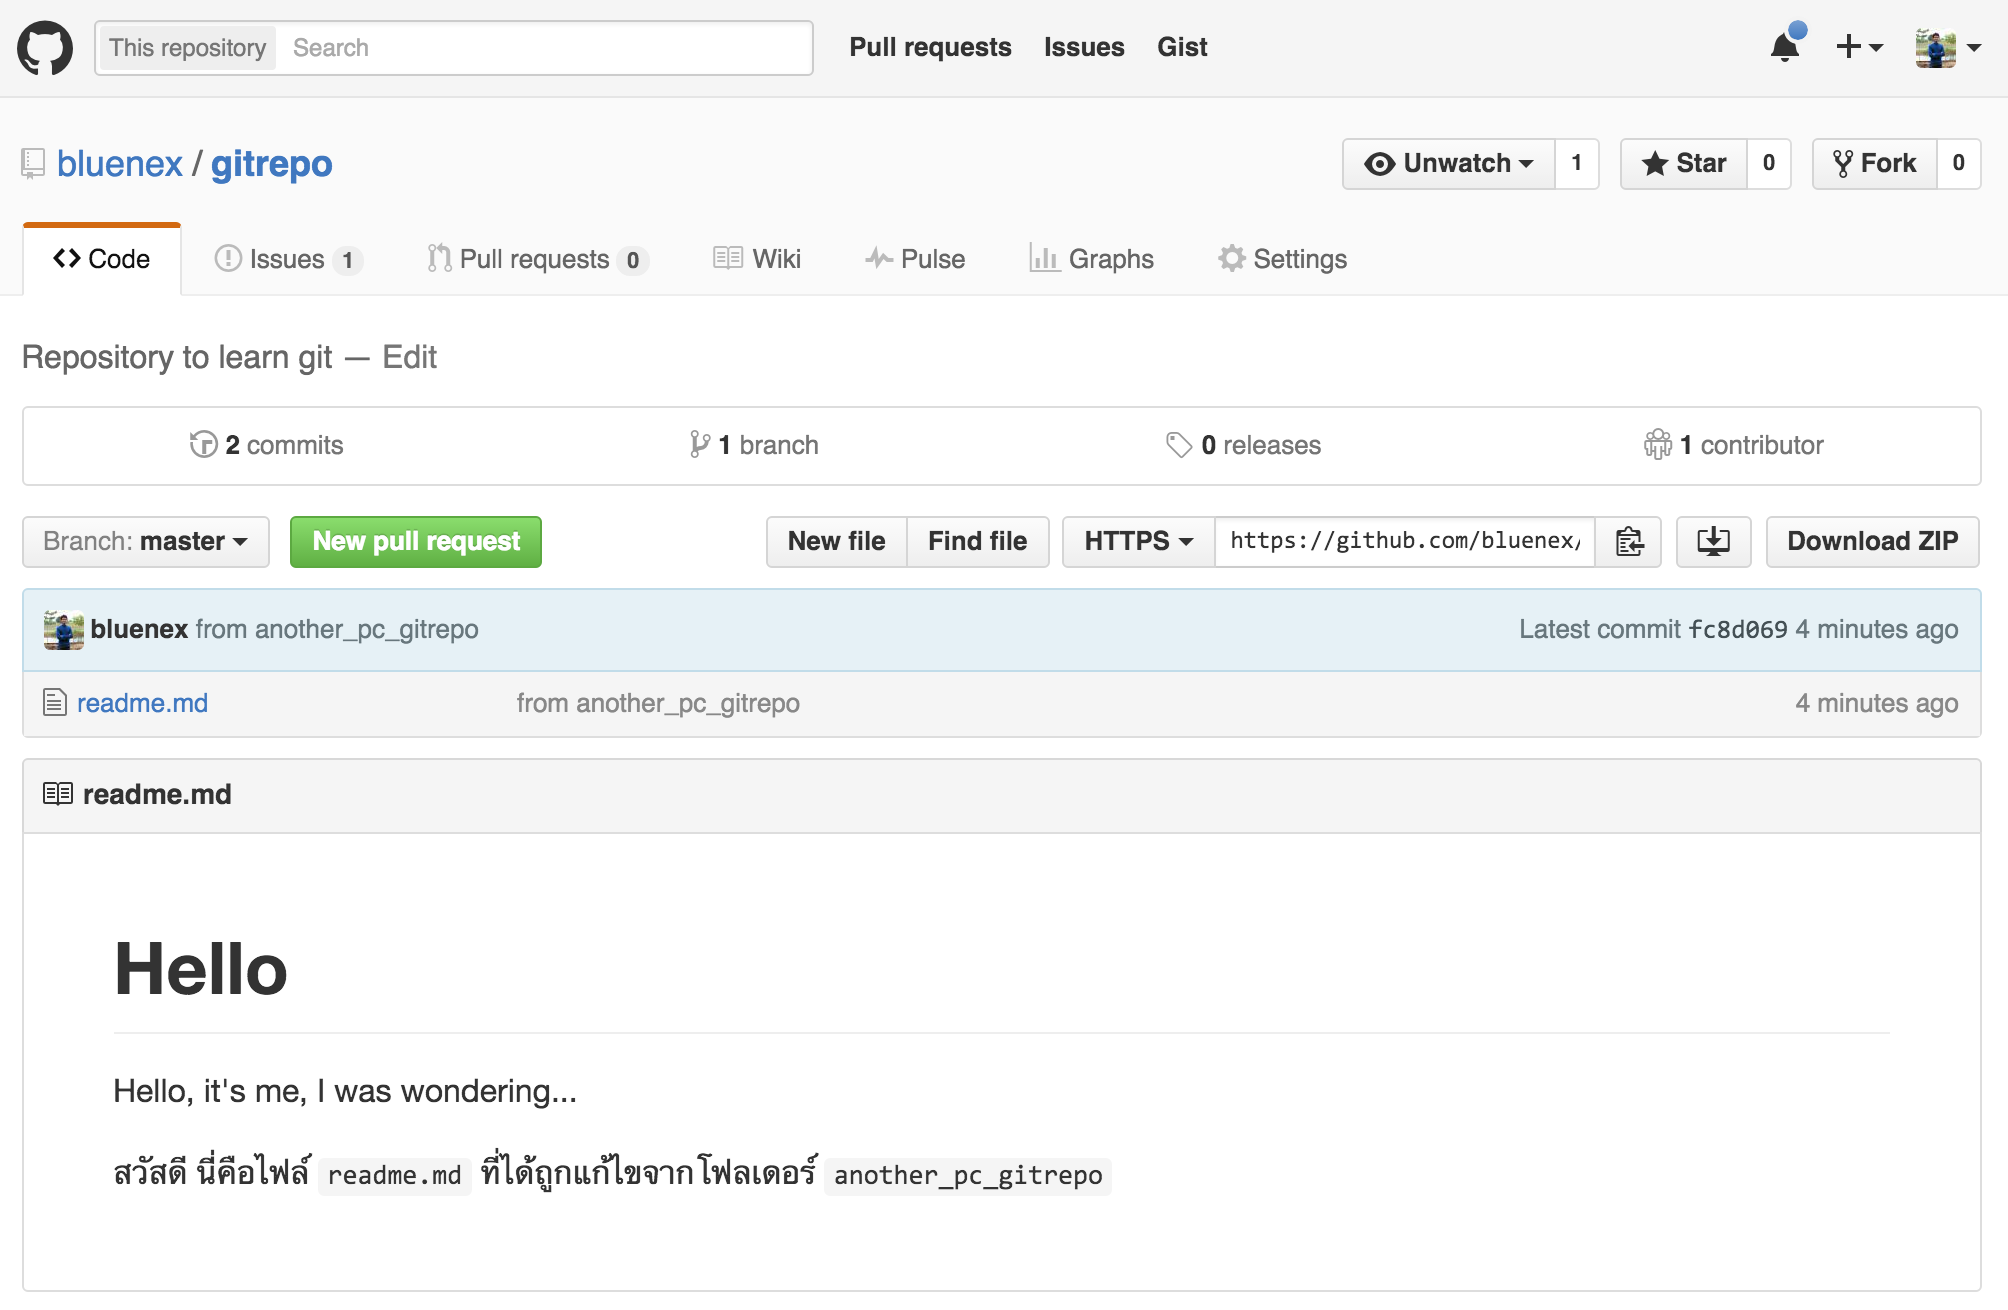
นั่นล่ะครับท่านผู้ชม ไฟล์ที่ถูกแก้ใน another_pc_gitrepo ได้ถูก push ไปยัง remote repo แล้ว คำถามต่อไป แล้ว gitrepo อันแรกล่ะ? นั่นน่ะสิ ไปลองดูกันเถอะ
# ออกจาก `another_pc_gitrepo` ก่อน
$ cd ..
$ cd gitrepo

# ดึงความเปลี่ยนแปลงลงมาตรวจสอบ
$ git fetch
remote: Counting objects: 3, done.
remote: Compressing objects: 100% (2/2), done.
remote: Total 3 (delta 0), reused 3 (delta 0), pack-reused 0
Unpacking objects: 100% (3/3), done.
From https://github.com/bluenex/gitrepo
   8eec696..fc8d069  master     -> origin/master

$ git log origin/master --oneline

fc8d069 from another_pc_gitrepo
8eec696 initial commit
(END)
จะเห็นได้ว่ามี commit เพิ่มขึ้นมาหนึ่งอันจาก another_pc_gitrepo ที่เราแก้เมื่อกี้นี่เอง แต่ fetch แล้วมันยังไม่รวมร่างกันนะ ไม่เชื่อลองไปเปิดไฟล์ gitrepo/readme.md ดูก็ได้ คราวนี้เราจะมารวมความเปลี่ยนแปลงที่เกิดขึ้นเข้ากับไฟล์ใน gitrepo นี้กัน
$ git merge origin/master
Updating 8eec696..fc8d069
Fast-forward
 readme.md | 4 ++++
 1 file changed, 4 insertions(+)
เรียบร้อย ทีนี้ลองเปิดไฟล์อีกรอบได้ ก็จะเห็นว่าไฟล์ gitrepo/readme.md ของเราได้รับความเปลี่ยนแปลงจาก another_pc_gitrepo/readme.md แล้ว เฮ~ แต่เรายังเหลืออีกคำสั่งที่ยังไม่ได้ใช้นั่นก็คือ git pull มาลองใช้กันแบบเร็วๆ เลย ก่อนอื่นก็ไปแก้ gitrepo/readme.md ก่อน
<!-- in readme.md file -->
# Hello
Hello, it's me, I was wondering...

สวัสดี นี่คือไฟล์ `readme.md` ที่ได้ถูกแก้ไขจากโฟลเดอร์ `another_pc_gitrepo`

ส่วนบรรทัดนี้ได้ถูกแก้ไขจากโฟลเดอร์ `gitrepo`
เสร็จแล้วก็ไปที่ terminal กัน
# check status
$ git status
On branch master
Changes not staged for commit:
  (use "git add <file>..." to update what will be committed)
  (use "git checkout -- <file>..." to discard changes in working directory)

        modified:   readme.md

no changes added to commit (use "git add" and/or "git commit -a")

# stage file
$ git add . && git commit -m "edit on gitrepo"
[master bc4c7e2] edit on gitrepo
 1 file changed, 2 insertions(+)

# push to remote
$ git push origin master
Username for 'https://github.com':
Password for 'https://bluenex@github.com':
Counting objects: 3, done.
Delta compression using up to 4 threads.
Compressing objects: 100% (2/2), done.
Writing objects: 100% (3/3), 321 bytes | 0 bytes/s, done.
Total 3 (delta 1), reused 0 (delta 0)
To https://github.com/bluenex/gitrepo.git
   fc8d069..bc4c7e2  master -> master

# go to another_pc_gitrepo folder
$ cd ../another_pc_gitrepo
$ git pull origin master
remote: Counting objects: 3, done.
remote: Compressing objects: 100% (1/1), done.
remote: Total 3 (delta 1), reused 3 (delta 1), pack-reused 0
Unpacking objects: 100% (3/3), done.
From https://github.com/bluenex/gitrepo
 * branch            master     -> FETCH_HEAD
   fc8d069..bc4c7e2  master     -> origin/master
Updating fc8d069..bc4c7e2
Fast-forward
 readme.md | 2 ++
 1 file changed, 2 insertions(+)
จากการ pull เราจะเห็นความแตกต่างก็คือ pull นั้นดึงความเปลี่ยนแปลงจาก remote มาแล้วทำการรวมเข้าด้วยกันกับ repo ที่อยู่ในเคร่ืองของเราเลย หรือเทียบเท่ากับ fetch + merge นั่นเอง
ส่งท้าย
สำหรับบล็อกนี้ก็เอาไว้เท่านี้ก่อน แนะนำให้ลองไปเล่นๆ repo บน GitHub ดู เช่นกดไปดูตรง commit เช็คว่าแต่ละ commit เกิดอะไรขึ้นเป็นต้น ไม่รู้ว่าอธิบายละเอียดเกินไปรึเปล่า แต่เท่านี้ก็น่าจะเพียงพอสำหรับมือใหม่สุดๆ ในพาร์ทต่อไปจะเริ่มใช้คำกระชับขึ้น ไม่อธิบายละเอียดเท่านี้แล้ว ถือว่ารู้จักคำสั่งต่างๆ พอสมควรแล้วจากบล็อกนี้ ก็อาจจะหายไปสักพัก ก่อนจะกลับมากับ part 2 ขอเวลาไปคิดก่อนว่าจะเขียนอะไรบ้างดี ฮ่าๆ ระหว่างนี้ก็ลองเล่นไปเรื่อยๆ ได้เลย การเรียนรู้ที่ดีคือการทดลองทำจริง มีอะไรอยากลองลองโลด ถ้ามันเจ๊งเราก็ลบโฟลเดอร์ทิ้งแล้ว clone มาใหม่ก็ได้
ขอให้สนุกกับการทดลอง :)